Visible crew/equipment: In the scene where Sgt. Bung wakes up in the bath, he hits his head on the copper water boiler. However, you can see the white padding that will protect his head stuck underneath the bottom of the boiler. This is visible throughout the scene. (00:57:15 - 00:58:00)
Visible crew/equipment: When Charles Hawtrey "jumps" onto the light near the end of the film you can see the strings pulling him across. The same can be seen with Jim Dale as well.
Visible crew/equipment: When Norman is hit by the bundle of newspapers he is thrown in the air and you can see the wires lifting him.
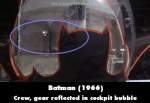
Visible crew/equipment: As the Batcoper emerges from its hangar, multiple crew and equipment are reflected in the cockpit's glass bubble. (00:04:05)

Visible crew/equipment: During the bar fight scene, when the big man picks up Frank a wire is visible on his jacket when the big man throws him.

Visible crew/equipment: After Johnny Finger makes his first entrance and shoots three guys, he looks over at the undertaker's shop, and reflected in the window of the shop next door is a crew member wearing a suit and tie. (00:02:55)
Visible crew/equipment: After Matt's arrested at the discotheque, when he's at the police station with Julian, the chalk actor's mark can be seen on the floor in front of Matt's feet.

Visible crew/equipment: Before the police officer removes the Griffin's racing helmet, a film crew member, equipment, and set lights are visible in the helmet's tinted visor.

Visible crew/equipment: Set lights are visible on Luther's Edsel as he pulls up to the police station.