Change of Heart/A Hole Lotta Love/Mime to Five - S1-E7
Continuity mistake: A Change of Heart: Disco Bear bumps his plate of bacon and eggs into the air with his chicken bones. Then, when the food lands on his face, the chicken bones are missing from his hands, then one chicken bone reappears in his right hand two shots later. (00:01:18)
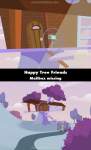
Wingin It'/Tongue in Cheek/Easy Comb, Easy Go - S1-E11
Continuity mistake: Easy Comb, Easy Go: When Disco Bear returns to his house in the truck, his mailbox is missing from where it should be. (00:15:13 - 00:19:56)
Wingin It'/Tongue in Cheek/Easy Comb, Easy Go - S1-E11
Continuity mistake: Easy Comb, Easy Go: When Disco Bear is taking the letter out of his mailbox, he and the mailbox are on the floor of the house, but two shots later, they both seemed to have moved to the step below. (00:15:18)
Doggone It/Concrete Solution/Sea What I Found - S1-E3
Continuity mistake: Concrete Solution: When the construction site on top of the bridge is first shown, there is no wire connected to the time clock, but in the next shot, there is. (00:09:14)

Doggone It/Concrete Solution/Sea What I Found - S1-E3
Continuity mistake: Concrete Solution: At the diner, Giggles pours some coffee into Handy's cup from the pitcher. Two shots later, she is not holding the pitcher anymore. The fork, knife, and napkin next to Handy's plate also vanish. (00:08:44)
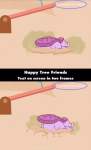
Easy for You to Sleigh/Whishy Washy/Who's to Flame - S1-E4
Continuity mistake: Who's to Flame?: At the end, Mime gets off his unicycle, and it falls to the ground next to him. Two shots later, the unicycle is gone. (00:21:10)
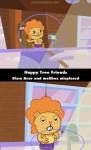
Easy for You to Sleigh/Whishy Washy/Who's to Flame - S1-E4
Continuity mistake: Easy for You to Sleigh: When we first see Flippy sleeping, there is a plate on his lap with four cookies on it. Later on, either Lifty or Shifty takes one cookie, leaving three cookies on the plate. In the next shot, there are four cookies on the plate again. (00:05:19)

Easy for You to Sleigh/Whishy Washy/Who's to Flame - S1-E4
Continuity mistake: Easy for You to Sleigh: When Lifty and Shifty are watching Mime in his tent, they come inside it after Mime leaves the room. In this shot, Shifty is missing his sack; then it reappears in the next shot. (00:03:32)
Easy for You to Sleigh/Whishy Washy/Who's to Flame - S1-E4
Continuity mistake: Easy for You to Sleigh: When Lifty and Shifty break into Pop and Cub's house, Shifty places his sack on the ground. Then, when they both run over to the Christmas tree, Shifty doesn't take the sack with him, and he still doesn't have it when they leave the house. However, when they both arrive at Mime's tent, Shifty has the sack again. (00:01:40 - 00:02:48)
Easy for You to Sleigh/Whishy Washy/Who's to Flame - S1-E4
Continuity mistake: Easy for You to Sleigh: When Lifty and Shifty are watching Mime in his tent, Mime leaves the room and turns off the lights using the light switch. Then, when Lifty and Shifty are inside the tent, the light switch has changed to the on position despite the lights still being off. (00:03:29)

Easy for You to Sleigh/Whishy Washy/Who's to Flame - S1-E4
Continuity mistake: Easy for You to Sleigh: At the start, there are pots on top of the stove. Then, when Pop opens the oven, the pots have disappeared from the stove. (00:00:57)

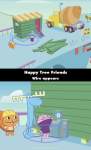
A Sight for Sore Eyes/Wipe Out/Letter Late Than Never - S1-E10
Continuity mistake: Letter Late Than Never: When Lumpy squeezes the box through Cuddles' mail slot, Cuddles grabs the box and opens it. Cuddles' left hand is on the lid, and his right hand is on the side. However, in the close-up of the dead Cub inside the box, Cuddles' left hand is on the side, and his right hand is gone entirely. This reverts in the next shot. (00:20:02)
A Sight for Sore Eyes/Wipe Out/Letter Late Than Never - S1-E10
Continuity mistake: Letter Late Than Never: After the turtle attacks Lumpy for the second time, Lumpy gets in the mail truck and drives off. Some boxes and letters fall out of the back of the truck, and in the next shot, the pile of mail is completely different. (00:18:40)
A Sight for Sore Eyes/Wipe Out/Letter Late Than Never - S1-E10
Continuity mistake: Letter Late Than Never: Pop puts an empty box on the sidewalk, and Cub goes inside it. In the next shot, the box is suddenly on the pathway to the house. (00:17:34)

A Sight for Sore Eyes/Wipe Out/Letter Late Than Never - S1-E10
Continuity mistake: Letter Late Than Never: When Lumpy is stamping letters at the start, he opens a heart-shaped box and eats some of the chocolates inside it. A moment later, the box is completely full again. (00:14:56)
A Sight for Sore Eyes/Wipe Out/Letter Late Than Never - S1-E10
Continuity mistake: Wipe Out!: After Lumpy finishes surfing, Giggles, Toothy, and Petunia see his surfing trophy with surfboards behind it. Throughout the next few shots, the surfboards change into completely different surfboards, and the trophy vanishes and reappears between shots. (00:09:39)

A Sight for Sore Eyes/Wipe Out/Letter Late Than Never - S1-E10
Continuity mistake: Wipe Out!: When Nutty gets a bib from The Mole, he puts it on, and it covers the candy cane on his chest. Then, after he gets an ice cream cone from the ice cream truck, the candy cane now appears over his bib. (00:08:38)

A Sight for Sore Eyes/Wipe Out/Letter Late Than Never - S1-E10
Continuity mistake: A Sight for Sore Eyes: When Russell is sitting in the waiting room, he sees two magazines on a table. He picks up one of the magazines, and in the next shot, the other magazine disappears from the table. The lamp on the table also moves closer to the edge between shots. (00:01:12)
The Wrong Side of the Tracks/From Hero to Eternity/And the Kitchen Sink - S1-E1
Continuity mistake: And the Kitchen Sink: When Pop's car is heading towards Lifty and Shifty, the right side of his car is intact, but in the next shot, it is suddenly broken, then goes back to fixed. This goes back and forth a few more times as the scene continues. (00:19:29)
The Wrong Side of the Tracks/From Hero to Eternity/And the Kitchen Sink - S1-E1
Continuity mistake: And the Kitchen Sink: When Cub is crying in the sink because of the hot water, there is a blue container to the left of the sink. Later on, when Pop breaks Cub's bone from under the sink and Cub screams, the container is now on the right side of the sink, then goes back to the left side a moment later. (00:17:58)