
Every Litter Bit Hurts/As You Wish/Take a Hike - S1-E5
Other mistake: Take a Hike: When Lumpy sees the bird on the ground, he climbs the tree and sees Flaky dead on the branch. The close-up of Flaky is supposed to be from Lumpy's perspective, so the branch should be pointing in the opposite direction. However, the branch is pointing in the same direction as it was in the previous shot. (00:18:40)

Every Litter Bit Hurts/As You Wish/Take a Hike - S1-E5
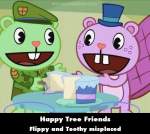
Continuity mistake: Take a Hike: When Lumpy sees Toothy's swollen arm, the axe is on the ground right next to them, but two shots later, the axe has vanished. (00:16:25)
Every Litter Bit Hurts/As You Wish/Take a Hike - S1-E5
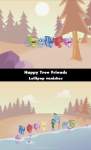
Continuity mistake: Take a Hike: At the start, Nutty has a lollipop on his tail, but a few seconds later, the lollipop has vanished. (00:14:44)
Blast from the Past/Chew Said a Mouthful/See What Develops - S1-E8
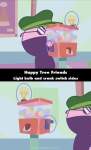
Continuity mistake: See What Develops: When The Mole starts using the gumball machine, the light bulb is on the right of the gumball machine, and the crank is on the left of it. Two shots later, the light bulb and crank have switched to the opposite sides. (00:16:52)
Blast from the Past/Chew Said a Mouthful/See What Develops - S1-E8
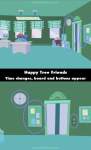
Continuity mistake: See What Develops: When Lumpy enters the office near the start, there is only a bulletin board on the right of the elevator and a clock on the left of it. A moment later, elevator buttons have appeared between the elevator and the bulletin board, another bulletin board has appeared to the left of the elevator, and the time on the clock changes. This all reverts in a following shot. (00:15:06)
Blast from the Past/Chew Said a Mouthful/See What Develops - S1-E8
Continuity mistake: Blast From the Past: Sniffles takes down the slide at the playground and throws all the pieces in the dumpster. A moment later, after Lumpy injures himself on the seesaw, there is a shot of Sniffles inside the time machine, and we can see through the door window that the slide is back up, all in one piece. (00:02:52 - 00:03:24)

I've Got You Under My Skin/In a Jam/Junk in the Trunk - S1-E12
Continuity mistake: Junk in the Trunk: When Lumpy is waiting for his elephant to come out of the car wash, he looks at the watch on his wrist, but in the next shot, the watch has vanished from his wrist. Additionally, the watch reappears and vanishes from his wrist in the middle of a following shot. (00:16:21)
I've Got You Under My Skin/In a Jam/Junk in the Trunk - S1-E12
Other mistake: Junk in the Trunk: When Lumpy is struggling to keep his washing machine shut, he notices a tape dispenser on the shelf. The problem is that the shelf is behind Lumpy, but Lumpy only looks to his right, not behind him. (00:15:12)

I've Got You Under My Skin/In a Jam/Junk in the Trunk - S1-E12
Other mistake: Junk in the Trunk: When Lumpy gets a piece of tape from the tape dispenser on the shelf, there is a mysterious blue stripe behind the orange bottle on the left, which vanishes mid-shot. (00:15:14)
I've Got You Under My Skin/In a Jam/Junk in the Trunk - S1-E12
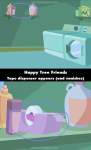
Continuity mistake: Junk in the Trunk: At the start, there is a shelf on the wall with no tape dispenser on it. Then, a moment later, Lumpy gets a piece of tape from a tape dispenser that suddenly appears on the shelf. In the next shot, the tape dispenser disappears. (00:14:47 - 00:15:15)
I've Got You Under My Skin/In a Jam/Junk in the Trunk - S1-E12
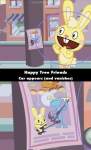
Continuity mistake: In a Jam: After Cuddles sees the flyer attached to the telephone pole, there is a close-up of the flyer as Cuddles imagines himself in the flyer. In this shot, there is what seems to be a red car that randomly appears to the right of the telephone pole, which then disappears in the next shot. (00:08:31)
I've Got You Under My Skin/In a Jam/Junk in the Trunk - S1-E12
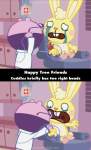
Other mistake: In a Jam: When Cuddles is first shown crying as The Mole is stabbing his arm, Cuddles briefly has two right hands before getting stabbed again. (00:09:45)
Party Animal/Ipso Fatso/Don't Yank My Chain - S1-E2
Audio problem: Party Animal: When Nutty stops spinning after Flippy cuts him up, Nutty can still briefly be heard screaming despite not being able to. (00:05:45)
Party Animal/Ipso Fatso/Don't Yank My Chain - S1-E2
Other mistake: Party Animal: When the peanuts fly into Flaky's mouth during the party, her body swells up like a balloon. It then cuts to a shot of Flippy and Toothy, but there is a problem with this shot. Only the top part of the table is within the frame, and the rest of the table extends beyond the frame to the ground. However, Flippy and Toothy's feet can be seen within the frame at the bottom, indicating that they are standing in mid-air. (00:04:48)
Party Animal/Ipso Fatso/Don't Yank My Chain - S1-E2
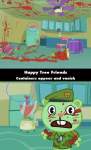
Continuity mistake: Party Animal: When Flippy looks around the room after Sniffles jumps into the barrel, there are two containers on top of the refrigerator that were never there previously. These containers disappear after Flaky explodes. (00:06:14 - 00:07:07)

Change of Heart/A Hole Lotta Love/Mime to Five - S1-E7
Other mistake: A Hole Lotta Love: After Pop throws the anchor out of the drill, the drill comes to a stop. In the next shot, we can see that the anchor chain does not go all the way into the hole; it gets cut off at the very end. (00:13:58)
Change of Heart/A Hole Lotta Love/Mime to Five - S1-E7
Continuity mistake: A Hole Lotta Love: When the drill digs into the ground for the first time, the glass dome at the top breaks, and the Mole's head gets crushed. After that, there are a few shots throughout the episode where the glass dome can still be seen on the drill. (00:10:08 - 00:13:37)
Change of Heart/A Hole Lotta Love/Mime to Five - S1-E7
Continuity mistake: A Change of Heart: Disco Bear bumps his plate of bacon and eggs into the air with his chicken bones. Then, when the food lands on his face, the chicken bones are missing from his hands, then one chicken bone reappears in his right hand two shots later. (00:01:18)
Change of Heart/A Hole Lotta Love/Mime to Five - S1-E7
Deliberate mistake: A Change of Heart: Right before Disco Bear bumps his plate into the air with the chicken bones, the plate is positioned on the edge of the counter, appearing as if it's floating in mid-air. This was most likely done on purpose so that he was able to bump the plate into the air; it would be impossible for him to do this if it were directly on the counter. (00:01:18)
Easy for You to Sleigh/Whishy Washy/Who's to Flame - S1-E4
Other mistake: Easy for You to Sleigh: Right before a cookie is taken from Flippy's plate of cookies, there is a shot of Lifty and Shifty standing together. In this shot, the outlines of Shifty's eyes vanish mid-shot. (00:05:17)


