
The Penguin Declines (3) - S2-E39
Continuity mistake: When Joker's goons return from Operation Laundry Bag and finally release Penguin from the bag, Penguin's hat is secured on his head with an elastic strap, but this strap vanishes in the next shot. (00:04:30)
Pop Goes the Joker (1) - S2-E57
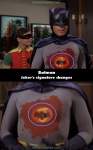
Continuity mistake: After Oliver Muzzy congratulates Joker for his magnificent artwork and makes a deal with him, before Joker leaves the gallery he runs his finger across Batman's yellow emblem to sign his red artwork, but at GCPD HQ when they're discussing the matter, Joker's signature is completely different, it's now a capital "J" on Batman's yellow emblem. (00:06:45)
The Penguin Declines (3) - S2-E39
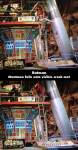
Visible crew/equipment: When Venus is at the Batcave, loads of fisticuffs ensue between the Caped Crusaders, Joker, Penguin and all the baddies. While Robin is up on the atomic pile scaffolding he punches one goon off the ladder, then as he falls we can see the edge of the brown crash mat rise up, right before the word "SPLATT!" appears onscreen. (00:20:50)
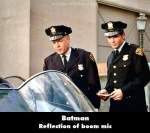
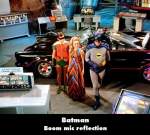
The Zodiac Crimes (1) - S2-E37
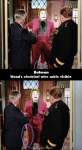
Visible crew/equipment: Bruce Wayne and Dick Grayson walk into the study alone when Bruce takes the Batphone call from Commissioner Gordon, then just as Bruce says, "The Joker again," at the top of the tuba bell we can see the reflection of a man wearing a white short-sleeved shirt and grey pants. Numerous studio lights are reflected as well. (00:03:15)
The Catwoman Goeth (2) (a.k.a. A Stitch in Time) - S2-E34
Visible crew/equipment: Outside the run down factory, when the GC police officers step out of their patrol car and walk over to the Batmobile, just as senior Officer Dietrich begins giving the rookie officer the what for, the reflection of the boom mic is visible on the Batmobile's left bubble windshield, at the left side of the screen. (00:10:50)
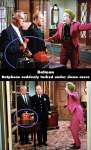
The Joker's Hard Times (2) - S2-E38
Continuity mistake: At GCPD HQ, when Commissioner Gordon decides to call Batman he removes the Batphone's acrylic dome cover and lifts the red receiver, still holding it when Joker shows up. Then, when Joker announces his next target is Libra the scales, in the next shot from a different angle, the Batphone is now untouched under the acrylic dome, between shots. (00:02:55)
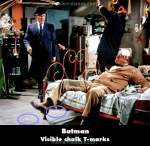
Scat, Darn Catwoman (2) - S2-E41
Visible crew/equipment: While Batman and Catwoman are at the Batcave the alarm goes off, so Batman activates the Diversionary Batphone Lines gadget, then it cuts to Pat Pending counting his cash, and when Commissioner Gordon and Chief O'Hara storm in, two chalk T-marks are visible on the floor near the bed. (00:12:30)

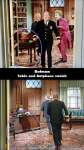
The Devil's Fingers (1) - S2-E15
Visible crew/equipment: When Commissioner Gordon calls Chandell to reassure him that Batman and Robin are back in action, Chandell shares more root beer with Harriet. Then, when he hints for her to leave, a T-mark taped to the floor is visible at the lower left side of the screen. (00:18:20)
The Joker's Hard Times (2) - S2-E38
Continuity mistake: After Joker enters Commissioner Gordon's office, Gordon and Chief O'Hara walk over to the window, and the Batphone table is behind them, beside Gordon's desk. Then Joker makes two "quick-frozen cops" and runs off to snatch Justice, leaving Gordon and O'Hara immobile. When their shock paralysis wears off, Gordon and O'Hara rush over to Gordon's desk, but the Batphone table and the Batphone have vanished (note the rug's pattern). (00:03:00 - 00:04:55)

The Joker's Hard Times (2) - S2-E38
Visible crew/equipment: After Joker and his henchmen steal the statue, it cuts to Commissioner Gordon and Chief O'Hara as they recover from their shock paralysis, and when they walk over to Gordon's desk, the wheel of filming equipment is visible at the right side of the screen. (00:04:55)
The Joker's Hard Times (2) - S2-E38
Revealing mistake: When Joker pays another visit to Commissioner Gordon and Chief O'Hara, Joker's holding his wand, and in the shots from outside the GCPD office window we can see the wire cable dragging behind Joker, which is attached to the wand and providing its power. During these shots, the actors' small white tape markers are also visible on the rug, beside the Batphone table. (00:03:00)
Marsha, Queen of Diamonds (1) - S2-E23
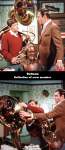
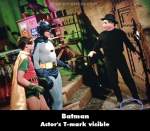
Continuity mistake: After Batman has been hit by Marsha's love dart, when Robin pulls the dart out and then begs Batman to resist it, in these semi closeups note Burt Ward's uncovered forearm with his still-healing burn wound. Then, while the Dynamic Duo fight Marsha's sabre wielding goons, Marsha hits Robin with another one of her darts and orders him to attack Batman. When this happens, Burt Ward's forearm now has a compression bandage around the wound. (00:13:55)
Penguin's Disastrous End (3) - S2-E44
Visible crew/equipment: When the Dynamic Duo follow the lizard trail and go down into the manhole they end up in Hilda's cave, and when they approach Penguin's goon standing by a door, there are two chalk T-marks on the floor near that door. (00:08:50)
The Zodiac Crimes (1) - S2-E37
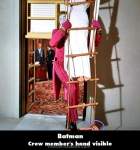
Visible crew/equipment: After Joker has stolen the map from Commissioner Gordon's office, he rushes to the window and calls for Venus, then just as Joker places his foot onto the lowest ladder rung, we can see a crew member's hand holding the same rung near Joker's foot, at the bottom of the screen. (00:02:05)
The Penguin Declines (3) - S2-E39
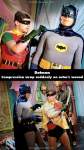
Visible crew/equipment: When Batman and Robin bring Venus to the Batcave, just as she says, "It's fabulous," the reflection of the moving boom pole/mic is visible on one of the Bat-computer screens, at the bottom right corner of the screen. As this shot continues, when Robin points out their Bat-radar, a chalk T-mark is visible on the floor near Batman's foot. Then, when Penguin, Joker, and the goons appear, more chalk T-marks are visible on their side of the floor. (00:17:10)
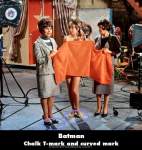
Penguin Is a Girl's Best Friend (1) - S2-E42
Visible crew/equipment: While Batman and Robin are at the studio, Harriet and the others from the Gotham City League of Film Decency confront Penguin about scene 12. When Harriet says, "This scene is bursting with other things as well," there's a shot facing Marsha with two other women, and we can see a curved chalk mark at Marsha's feet and a chalk T-mark at the other woman's feet. (00:13:20)


Answer: There were three well-known actors who played Mr. Freeze, each one a different height, weight, and physique. As these were notable guest stars, the costume designers would adapt the costume to best fit each actor who likely would want to avoid comparisons to the other Mr. Freezes, incorporate their preferences, as well as refresh the look, rework whatever didn't work in previous versions, and so on.
raywest ★